
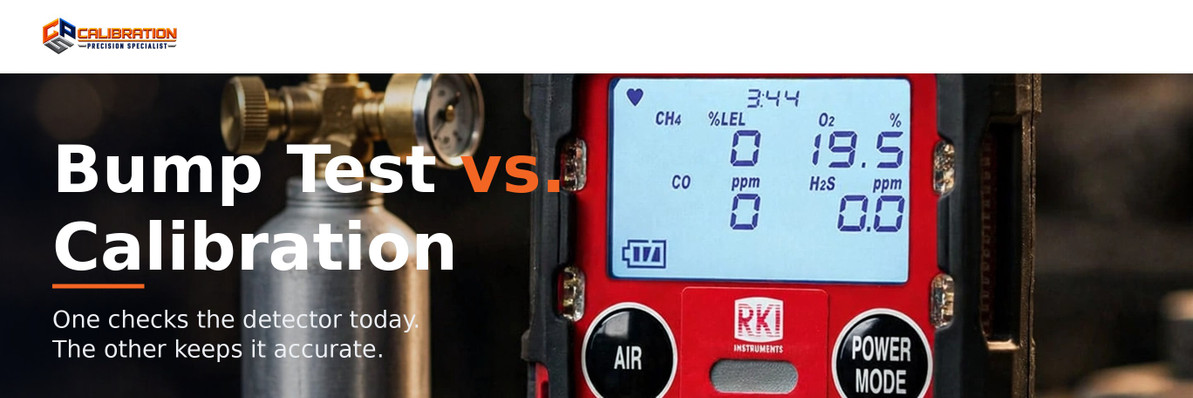
Bump Test vs. Calibration: What's the Difference and When Do You Need Each?
Ask ten safety managers what the difference between a bump test and a calibration is, and you'll get at least three wrong answers. This isn't a trivia question — mixing these up is how gas monitors drift out of adjustment and fail in the field without anyone realizing it. In refineries, utilities, water/wastewater plants, and construction, a gas detector you can't trust is worse than no detector at all, because it gives people a false reason to feel safe.
The short answer: a bump test is a quick pass/fail check that your gas detector responds to gas. It does not adjust the instrument. A calibration is a full adjustment procedure that uses a known concentration of calibration gas to set the sensor's readings back to correct. Bump test daily; calibrate on a schedule — and any time a bump test fails or a sensor has been exposed to something that could damage it.
What Is a Bump Test?
A bump test (sometimes called a "bump check") exposes each sensor in your gas detector to a concentration of gas slightly above the instrument's alarm setpoints, just long enough to verify that the sensors respond, the alarms trigger, and the display reads approximately what it should. It takes 30 seconds to a couple of minutes per instrument.
The key word is approximately. A bump test does not check whether the reading is accurate — it checks whether the instrument responds at all. If you bump a detector with 4-gas mix and the H2S sensor shows something in the neighborhood of the alarm value and the alarm sounds, the bump test passes. It tells you the sensor isn't dead, the alarms work, and the pump (if equipped) is pulling sample.
Think of it like tapping on a microphone before a meeting. You're not checking the sound quality — you're checking that the mic is on.
What a bump test covers: sensor response, alarm function, display operation, and pump flow on pump-equipped instruments like the RKI GX-Force.
What a bump test does NOT cover: sensor accuracy. A detector can pass a bump test and still read 15% low on H2S. That's why calibration exists.
What Is Calibration?
Calibration uses a certified concentration of calibration gas — typically a 4-gas mix of H2S, CO, CH4, and O2, or a single gas for single-gas instruments — to adjust the instrument's sensor outputs so the display matches the known gas concentration exactly. This is a multi-minute procedure, usually performed with a regulator that delivers a steady fixed flow of gas to the sensor.
During calibration, the instrument compares what the sensor is reading against what the gas bottle says is in the mix, then adjusts the sensor's span value to match. On a modern instrument like the RKI GX-3R or GX-3R Pro, calibration is menu-guided: you connect the gas, start the routine, and the instrument walks through each channel.
The standard 4-gas calibration mix used across industry is:
- Hydrogen sulfide (H2S): 25 ppm
- Carbon monoxide (CO): 50 ppm
- Methane (CH4): 50% LEL (2.5% by volume)
- Oxygen (O2): 12.0%
That combination covers the four sensors in most portable multi-gas detectors in a single bottle — like our 4-gas calibration gas (H2S 25 / CO 50 / CH4 50% LEL / O2 12%).
Why Both Matter (and Why "One or the Other" Is a False Choice)
Somewhere along the way, a rumor got started that you can bump test instead of calibrating, or calibrate instead of bump testing. Both are wrong, and here's why:
- A bump test can't fix a drifting sensor. Sensors drift. It's physics — electrochemical cells age, catalytic beads lose activity, and environmental exposure shifts readings. A bump test will not correct that drift. Only calibration does.
- Calibration can't catch a sudden failure between scheduled checks. A sensor can be knocked dead by a drop, poisoned by silicone or lead exposure, or just die of old age. If your calibration interval is 30 days, a dead sensor sits on a worker's belt for up to 29 days before anyone notices — unless you're bump testing daily.
ANSI/ISA-60079-29-2 (the recognized standard for selection, installation, use, and maintenance of portable gas detection equipment) recommends a bump test before each day's use and calibration on a regular schedule per the manufacturer's recommendations. RKI Instruments, like most major manufacturers, recommends bump testing daily and calibrating at least every 180 days — more often in harsh environments or after any incident that could affect the sensors.
The bottom line: bump testing and calibration are two halves of the same job. One checks the instrument today; the other keeps it accurate over time.
How Often Should You Bump Test and Calibrate?
Bump testing: before each day of use
Every instrument that goes into the field should be bump tested before that shift's use. That's the manufacturer and ANSI recommendation, and it's the only way to catch a sensor that died overnight. If your crew skips daily bump tests, you're accepting that a detector could be non-functional for an entire shift with nobody knowing.
In practice, this means your crew needs a bump test station (a manual test station or an automatic docking station) and a bottle of bump test gas at the shop. The procedure takes under a minute per instrument once people are trained on it.
Calibration: on a schedule, and on condition
Most manufacturers recommend calibration at least every 180 days. But "on condition" triggers matter just as much:
- Failed bump test: if an instrument fails a bump test — a sensor doesn't respond, an alarm doesn't sound — run a full calibration. If it still fails after calibration, the sensor is done. Replace it.
- After sensor replacement: new sensors need calibration before going into service.
- After exposure to contaminants: silicones, lead, sulfur compounds, and high concentrations of target gases can poison or shift sensors. Calibrate after any such exposure.
- After physical abuse: dropped instruments, exposure to extreme heat or cold, or water ingress warrant a calibration check.
- When the reading looks wrong: if the display reads something odd in clean air, don't guess. Calibrate.
In harsh environments — high heat, heavy dust, chemical exposure, constant use — many sites calibrate monthly or even weekly. Know your environment and adjust the schedule to match. When in doubt, calibrate more often. Calibration gas is cheap; a bad reading is expensive.
How to Bump Test a Gas Detector (Step by Step)
1. Check the basics first. Make sure the instrument is charged, the filters and inlet are clean, and the sample tubing is in good shape. Bump testing a monitor with a clogged filter gives you garbage results.
2. Connect the gas. Using a regulator on your calibration gas cylinder (a CGA-600 or C-10 fixed-flow regulator, depending on your bottle's valve), route gas to the instrument's calibration adapter or docking station.
3. Apply gas above alarm levels. Open the regulator and let the gas flow to the instrument. The sensors should respond within seconds, and the alarms should trigger at their setpoints.
4. Confirm response on every channel. Watch each gas channel — H2S, CO, LEL, O2 — and confirm the readings come up near the expected values and the audible, visual, and vibrating alarms all activate.
5. Log it. Record the date, instrument serial number, gas cylinder used, and pass/fail. If it fails, tag the instrument out of service and calibrate before returning it to the field.
A bump test gas mix doesn't need to be the same as your calibration mix — many people use the same 4-gas cylinder for both, which is fine — it just needs to be high enough to trip the alarms.
How to Calibrate a Gas Detector (Step by Step)
1. Get into a safe, clean environment. Calibrate in fresh, clean air — not on a shop floor with exhaust fumes or solvents in the air. The zero (fresh air) step assumes the air is clean, and bad air means a bad zero.
2. Connect the calibration gas. Attach your fixed-flow regulator (CGA-600 or C-10, matched to your cylinder valve) to the cylinder, connect tubing to the instrument's calibration adapter, and start the calibration routine on the instrument.
3. Zero the instrument. The instrument reads the ambient air and sets all channels to zero (O2 reads normal air at 20.9%).
4. Span each channel. The instrument prompts you to apply gas; open the regulator, let the instrument sample the known concentration, and it adjusts each sensor's span to match the bottle's certified values.
5. Verify and log. Confirm the calibration passed, then log the date, instrument, gas lot number, and cylinder expiration date. Most instruments stamp calibration records internally, but keep your own log too — auditors ask for it.
One thing to watch: calibration gas cylinders have expiration dates. Check them. An expired cylinder's concentration is no longer certified, which means a calibration performed with it is built on a guess. Don't calibrate with expired gas.
Common Mistakes We See
- Confusing a bump test with a calibration. "We bump test every day, so we never calibrate." That's the most dangerous mistake on this list. Daily bump tests never correct drift.
- Calibrating with the wrong gas concentration. The values entered in the instrument must match the cylinder's certified values exactly. Typing in 50 ppm H2S when the bottle is 25 ppm produces a detector that's wrong by a factor of two.
- Using the wrong regulator. Disposable calibration gas cylinders use either CGA-600 or C-10 valves. Match your regulator to the valve — a CGA-600 regulator will not fit a C-10 bottle. Check before you order.
- Calibrating in contaminated air. Doing the zero step next to a running diesel generator or a parts washer is a classic. The instrument zeroes on dirty air, and every reading after that is wrong.
- No records. If it isn't logged, it didn't happen — at least as far as an OSHA inspection or an incident investigation is concerned. Keep bump test and calibration logs per instrument serial number.
- Letting cylinders expire on the shelf. Gas cylinders don't last forever. Rotate stock, check expiration dates, and reorder before you run out.
What Gas and Regulators Do You Need?
For bump testing and calibrating a standard 4-gas portable like the RKI GX-3R or GX-3R Pro, you need one 4-gas cylinder (H2S 25 ppm / CO 50 ppm / CH4 50% LEL / O2 12%) and one fixed-flow regulator. That single setup handles both bump tests and calibrations.
- Cylinders come in 34L, 58L, and 103L sizes. The 34L is the common field size; the 58L and 103L last longer for high-volume shops running docking stations all day. Pick the size that matches how many instruments you're testing.
- Regulators: choose a fixed-flow regulator with the right connection for your cylinder — CGA-600 or C-10. Fixed-flow (typically 0.5 LPM) is the right call for portable instrument calibration; the steady flow gives the sensor a stable sample.
- Single-gas cylinders are available for single-gas instruments and for sensors that need a dedicated span gas outside the 4-gas mix.
Stock up before you're out. A shop with twenty detectors and no calibration gas is a shop full of question marks.
FAQ
How often should you bump test a gas detector?
Before each day's use. That's the recommendation from ANSI/ISA-60079-29-2 and from manufacturers including RKI Instruments. A bump test takes under a minute per instrument and is the only way to catch a sensor that failed between calibrations.
Does a bump test replace calibration?
No. A bump test is a pass/fail check that confirms sensors respond and alarms work — it does not adjust the instrument or correct sensor drift. Calibration is the separate procedure that adjusts the sensor's readings to match a known gas concentration. You need both.
What is the difference between bump testing and calibration?
Bump testing briefly exposes sensors to gas to verify they respond and alarms trigger; it changes nothing. Calibration exposes sensors to a certified gas concentration and adjusts the instrument's readings to match it exactly. Bump test daily, calibrate on schedule.
What gas do you use for a bump test?
Any gas mix with concentrations above the instrument's alarm setpoints. Most shops use their standard 4-gas calibration cylinder (H2S 25 ppm / CO 50 ppm / CH4 50% LEL / O2 12%) for both bump tests and calibrations.
What happens if a bump test fails?
Tag the instrument out of service immediately and run a full calibration. If the instrument passes calibration, return it to service. If it still fails, the sensor needs replacement — do not put it back in the field.
The Bottom Line
Bump testing tells you the detector works today. Calibration keeps it accurate for the long haul. Skip either one and you're guessing about the air your people breathe — and guessing is not a safety program.
Set it up right and it's simple: bump test every instrument before each day's use, calibrate on a real schedule (and any time something goes wrong), and keep your gas cylinders and regulators in date. The RKI GX-3R and GX-3R Pro are solid, reliable instruments — but like every gas detector, they're only as trustworthy as the last time they were tested and calibrated.
Keep your crew's monitors honest. Call CPS Calibrations at 865-900-8844 or stock up on 4-gas calibration cylinders, single gases, and CGA-600 and C-10 fixed-flow regulators.
Recent Posts
-

Electrochemical Toxic Sensors: Cross-Sensitivities That Fool Your Readings
Your carbon monoxide alarm goes off in the battery room. You sweep the area — there's no CO source a …Oct 8th 2026 -

Why Oxygen Sensors Die — and How to Make Them Last
Every 4-gas monitor has an oxygen channel, and it's the only channel with a built-in expiration date …Oct 7th 2026 -
Catalytic Bead vs. Infrared LEL Sensors: When Each Wins
Most gas detectors read %LEL the same way on the display. What's happening behind that number is any …Oct 6th 2026